This is the third part in the series of blog posts on how to integrate Office Web Apps Server with custom applications.
Update 2014-11-26: This series of blog post has been terminated and I do not plan to write any more posts about this subject. Sorry!
Don’t do what I did
Before we can actually integrate anything with Office Web Apps 2013, we need to install it first. The installation process is quite simple and Microsoft provides quite good instructions on how to do it. But even with those instructions I managed to do it wrong on the first try. I was too eager to start testing the product and did not read all the server requirements first.
I actually made two mistakes on my failed attempt to install the Office Web Apps server. In order to have just a single virtual machine to run, I tried to install it on a virtual server that was also acting as a domain controller. The virtual machine also had a previously installed instance of SQL Server running on it. Office Web Apps installer did not warn me about these issues and installed the software normally. The Office Web Apps server even partially worked after the installation, which made it a little bit hard to notice my mistake.
Server requirements
I could have saved a lot of my time, if I had just read the TechNet article about planning Office Web Apps Server more carefully. That article mentions these requirements for the server which are not mentioned in the installation guide:
- Server must not run any other server application (Exchange Server, SharePoint Server, Lync Server or SQL Server)
- Do not install any services or roles that depend on the Web Server (IIS) role on port 80, 443, or 809.
- Do not install any version of Office.
- The server should not be a domain controller.
- Server must be part of a domain.
- The following ports should not blocked by firewalls: 80 (HTTP), 443 (HTTPS) and 809 (traffic between WAC farm servers)
Installation
The installation itself is quite straightforward. Like I mentioned in the beginning of this post, Microsoft did a pretty good job describing the installation prorcess in their Technet article. That article even contains the necessary powershell scripts for adding the required IIS roles. Here’s a short summary of the necessary installation steps:
- Install the required prerequisites on the server
- Enable the required roles for IIS
- Download the CD-image for Office Web Apps server (available here) and mount it to the server
- Run the setup program.
- Configure the Office Web Apps farm using powershell.
When configuring the Office Web Apps Farm, I recommend using HTTP instead of HTTPS in a test environment because this makes debugging using tools like Fiddler a lot easier. I also recommend enabling the “Open From Url” functionality because you can use that to easily verify that your installation is working correctly. You can always disable it later with the Set-OfficeWebAppsFarm-command.
New-OfficeWebAppsFarm -Verbose –InternalURL "http://name_of_your_server" –AllowHttp -EditingEnabled -OpenFromUrlEnabled
Testing the installation
According to the deployment instructions, you can test the installation by navigating to http://name_of_your_server/hosting/discovery. You should see a Web app Open Platform Interface (WOPI)-discovery XML file in your web browser. Time to shut down the computer and go home? Unfortunately no…
Remember when I said that, my failed installation worked partially? This discovery-xml part was actually one of the things that worked. So you should not stop your testing here. You should also test that your installation can actually render documents to HTML form. The “-OpenFromUrlEnabled” setting allows us to do just that. So launch up your browser again and navigate to the following address:
http://name_of_your_server/op/generate.aspx
To verify that your fresh installation can render documents in HTML form, type in an URL pointing to a MS Office document and press the “Generate link” button. Office Web Apps server should not generate an URL for you that can be used to view that document using a browser.

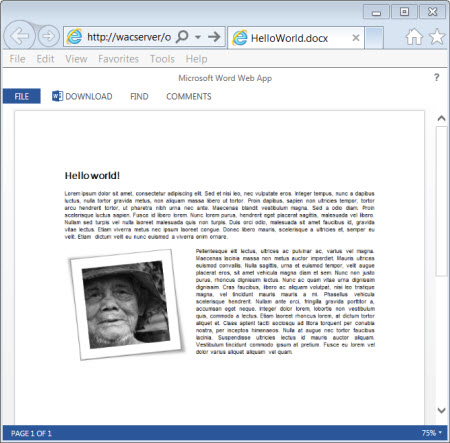
After clicking “Test this link” -link, you should see you document rendered nicely in your browser window and can finally go home.

Troubleshooting
If you run into problems with you own installation, you should always check both server’s Event Viewer and Office Web Apps ULS-logs for any error messages. The ULS logs can, by default, be found at C:\programdata\Microsoft\OfficeWebApps\Data\Logs\ULS and you can use tools like UlsViewer to monitor those log entries. You can also change the logging level using the powershell command “Set-OfficeWebAppsFarm -LogVerbosity” to view more detailed log messages.
In the next part of this series we go through a simple way to use Office Web Apps as an online viewer for you own application.